


How To Guide: How to hang a pocket door
Posted by Kevin Stanley on 13th Oct 2023
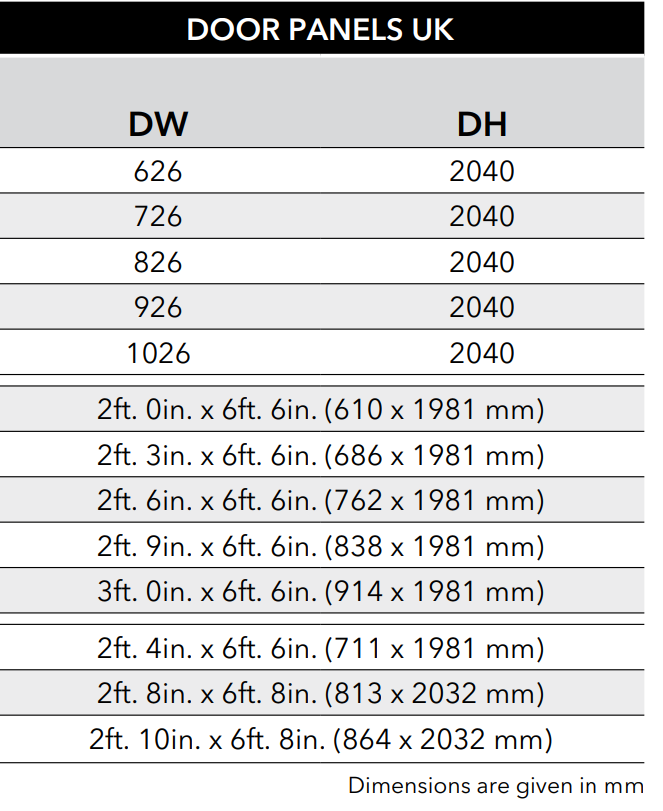
Note: Firstly, you should establish what is the exact size of door it is that you are going to install. There are ten standard UK sizes and three standard Irish sizes. But there are non-standard sizes as well. It is important to know the exact size as everything else works around the door.
1) Measure the width of the door
2) Fit the anti-warp under-door profile (see our Technical Guide on how to do this here
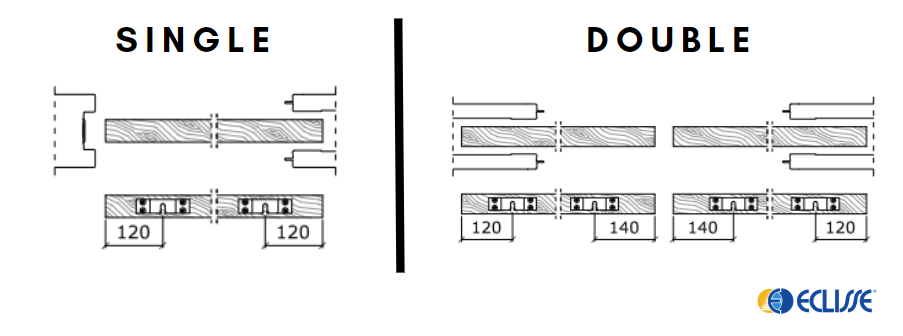
3) Screw brackets to the top of the door. By default, the centre of the bracket should be 120mm in from the leading edge and trailing edge of the door.
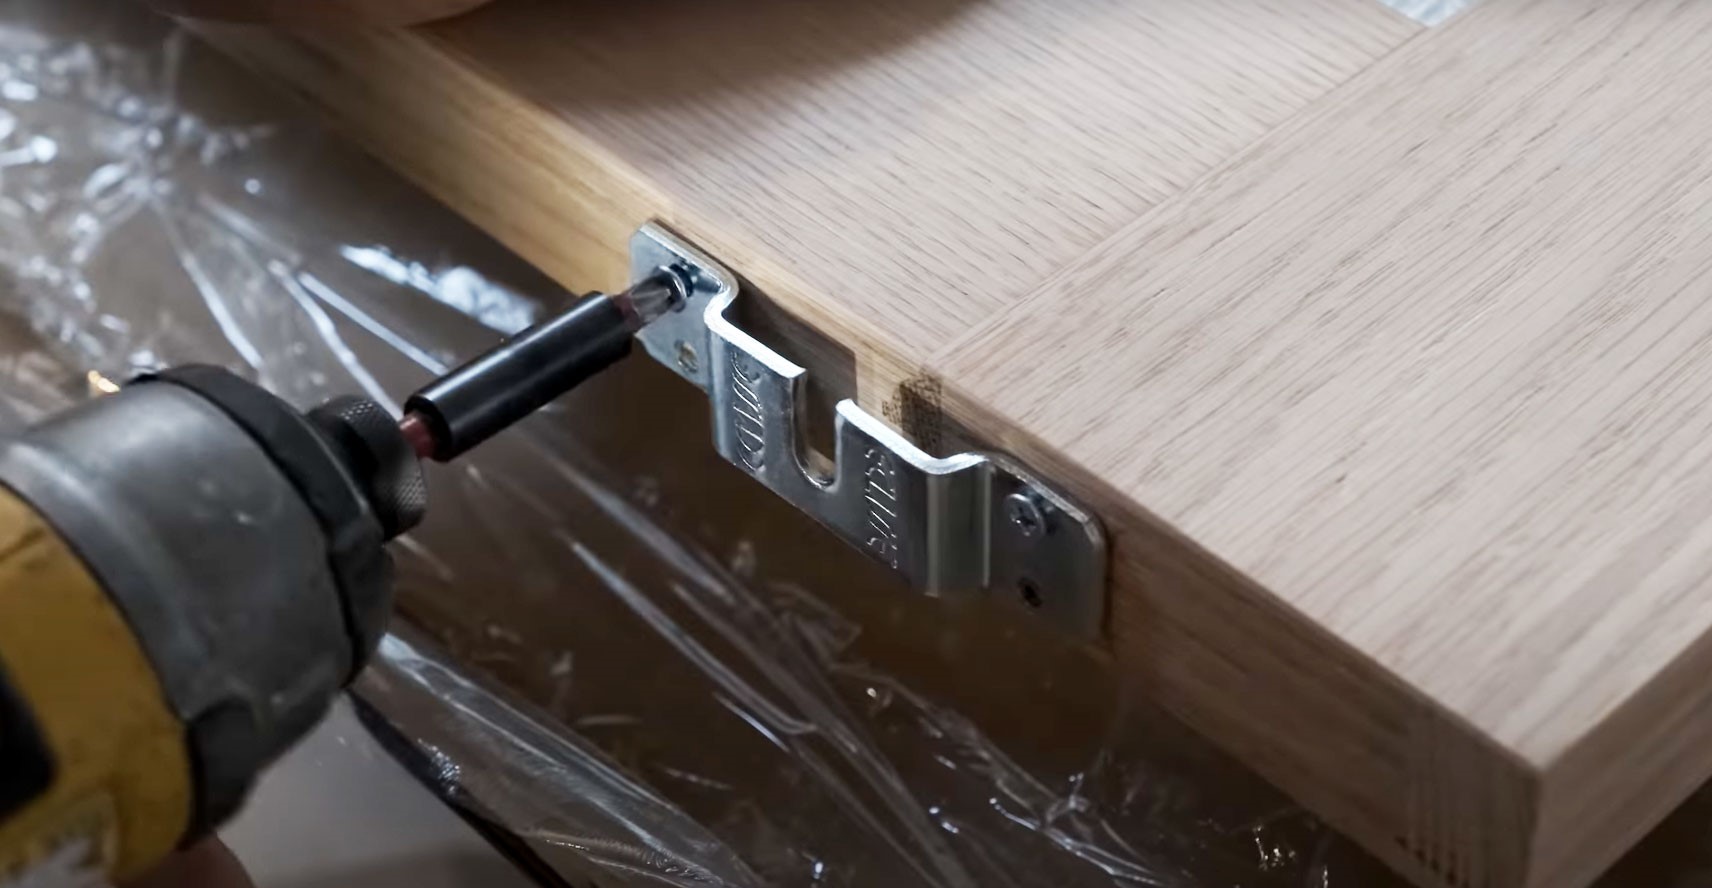
Note: If you are fitting accessories you may need to reposition the brackets. Please refer to installation instructions of the accessory for these details or contact the customer service team on 0333 5770828 for more information.
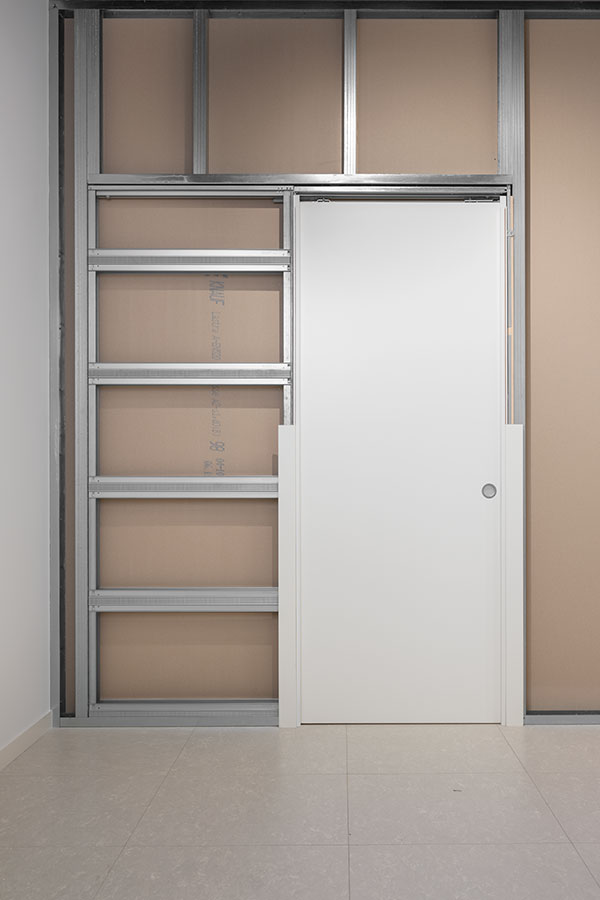
4) Hang the door:
a) Assemble the rollers by screwing the locking nuts onto the hanging bolt
b) Insert the rollers into the track
c) Hook the door onto the hanging bolts
Note: The brackets have a horseshoe shaped cut out and they hook over the hanging bolts
-Begin with the trailing edge of the door (rear) by hooking it into place
-Guide the anti-warp profile over the floor guide pin
-Push it slightly back into the
pocket while pivoting the leading edge inline with the pocket system and then
hook it on
Tip: Once the door is hung you must ensure that it is level and square against the door post
5) Level the door, and lock it into place using a pair of spanners to tighten the locking nut
Tip: In order to lock the door into place effectively, you must use two spanners. One spanner to hold the hanging bolt in place and a second spanner to tighten the locking nut. It is essential to tighten the flanged tooth locking nut to such a degree that it bites into the metal of the bracket. It is only possible to get sufficient tightness with two spanners. Once it’s tight, you should never need to make adjustments again
6) Test the door. Open and close the door to see if it is running properly. Check to see if any accessories that you have fitted are working correctly
7) Fit the jambs
Note: Unless you have done everything perfectly, it is possible that the brushes may now be slightly out of position
8) Retest the door is working correctly and smoothly. It is important to check that the door is correctly aligned with the brushes. If the door is not perfectly not central it will force itself alongside the brushes and this will cause the door to drag, affecting the working of any accessories that you may have fitted, and cause noise
9) Make any adjustments necessary to ensure that the door is running correctly and smoothly.
Note: For fully tempered frameless glass doors, use exactly the same process but you must use an adjustment pin and a spanner rather than two spanners.
