
How to Guide: Putting up new studwork for ECLISSE UK Classic door systems
Posted by Kevin Stanley on 3rd May 2023
If you are a professional tradesperson, or carpenter, this guide may be useful as a quick refresher, but on the whole, we wouldn’t expect to be teaching you anything new here. For a competent DIYer we recommend you use this guide to assist you in putting up studwork that is suitable for the ECLISSE pocket door system.
For DIYers we will assume that you have already done the appropriate amount of research or have experience of erecting studwork. Whilst this job can be done by a competent DIYer it is not something that we would recommend you do for the first time without professional assistance or adequate training. This guide should be used as, exactly that, a guide to supplement prior experience or knowledge. It will help you to erect studwork that is suitable for the ECLISSE pocket door system.
Video Credit: YouTube - @TommysYardchannel
Tools for the job
- Laser line (or plumbline/stringline)
- Drill driver and suitable drill bits
- Mitre saw and a saw bench.
Materials for the job
- Timber
- Wood screws
- Rawl plugs
- Plasterboard
- Plasterboard jointing tape
- Plasterboard screws.
How To Guide:
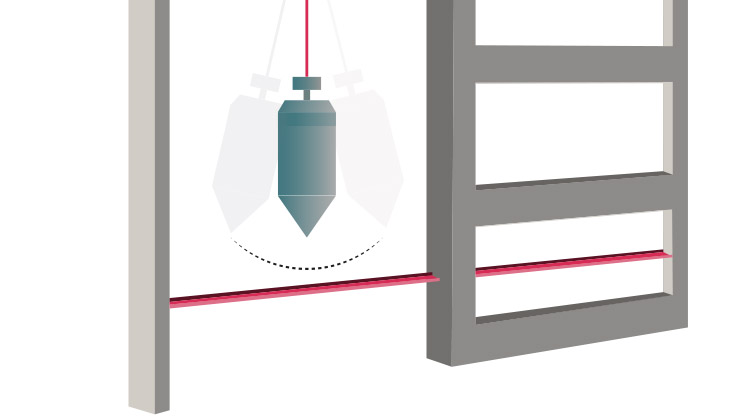
1. Map out where the studwork is going to be erected. You may wish to use a stringline, or a plumbline, but we would suggest using a self-levelling laser line that will throw a laser line across the floor, up the wall, and across the ceiling. This will make it very simple to see where the studwork needs to go and make it almost impossible to make a mistake
2. Leave the laser line switched on showing where the studwork will go, or if using a string or plumbline, mark out in pencil where the studwork will go
3. Fix the top plate into place in the ceiling
4. Fix the base plate to the floor
5. Ensure that the top plate and the base plate are perfectly aligned
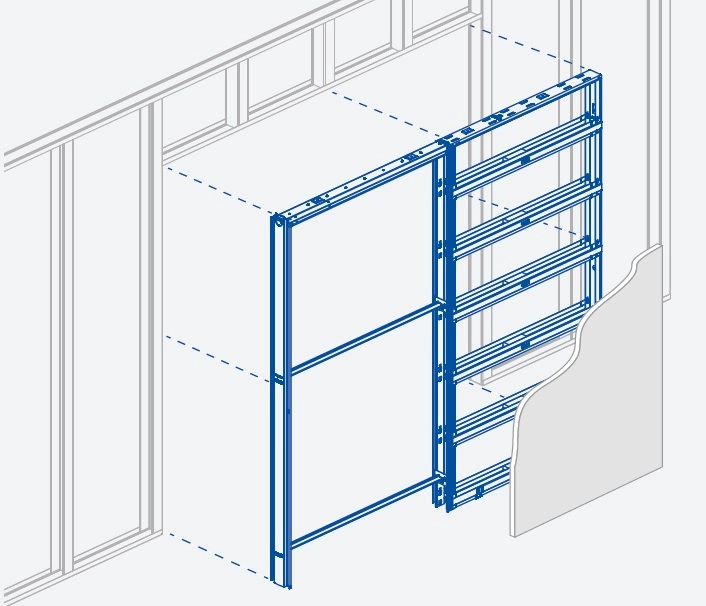
6. Fix the vertical studs into place, at 90 degrees between the top plate and the base plate. Fix the vertical studs at 400mm (most common) or 600mm centres dependent upon your requirements. These measurements are predominately designed to accommodate the simple fitting of plasterboard
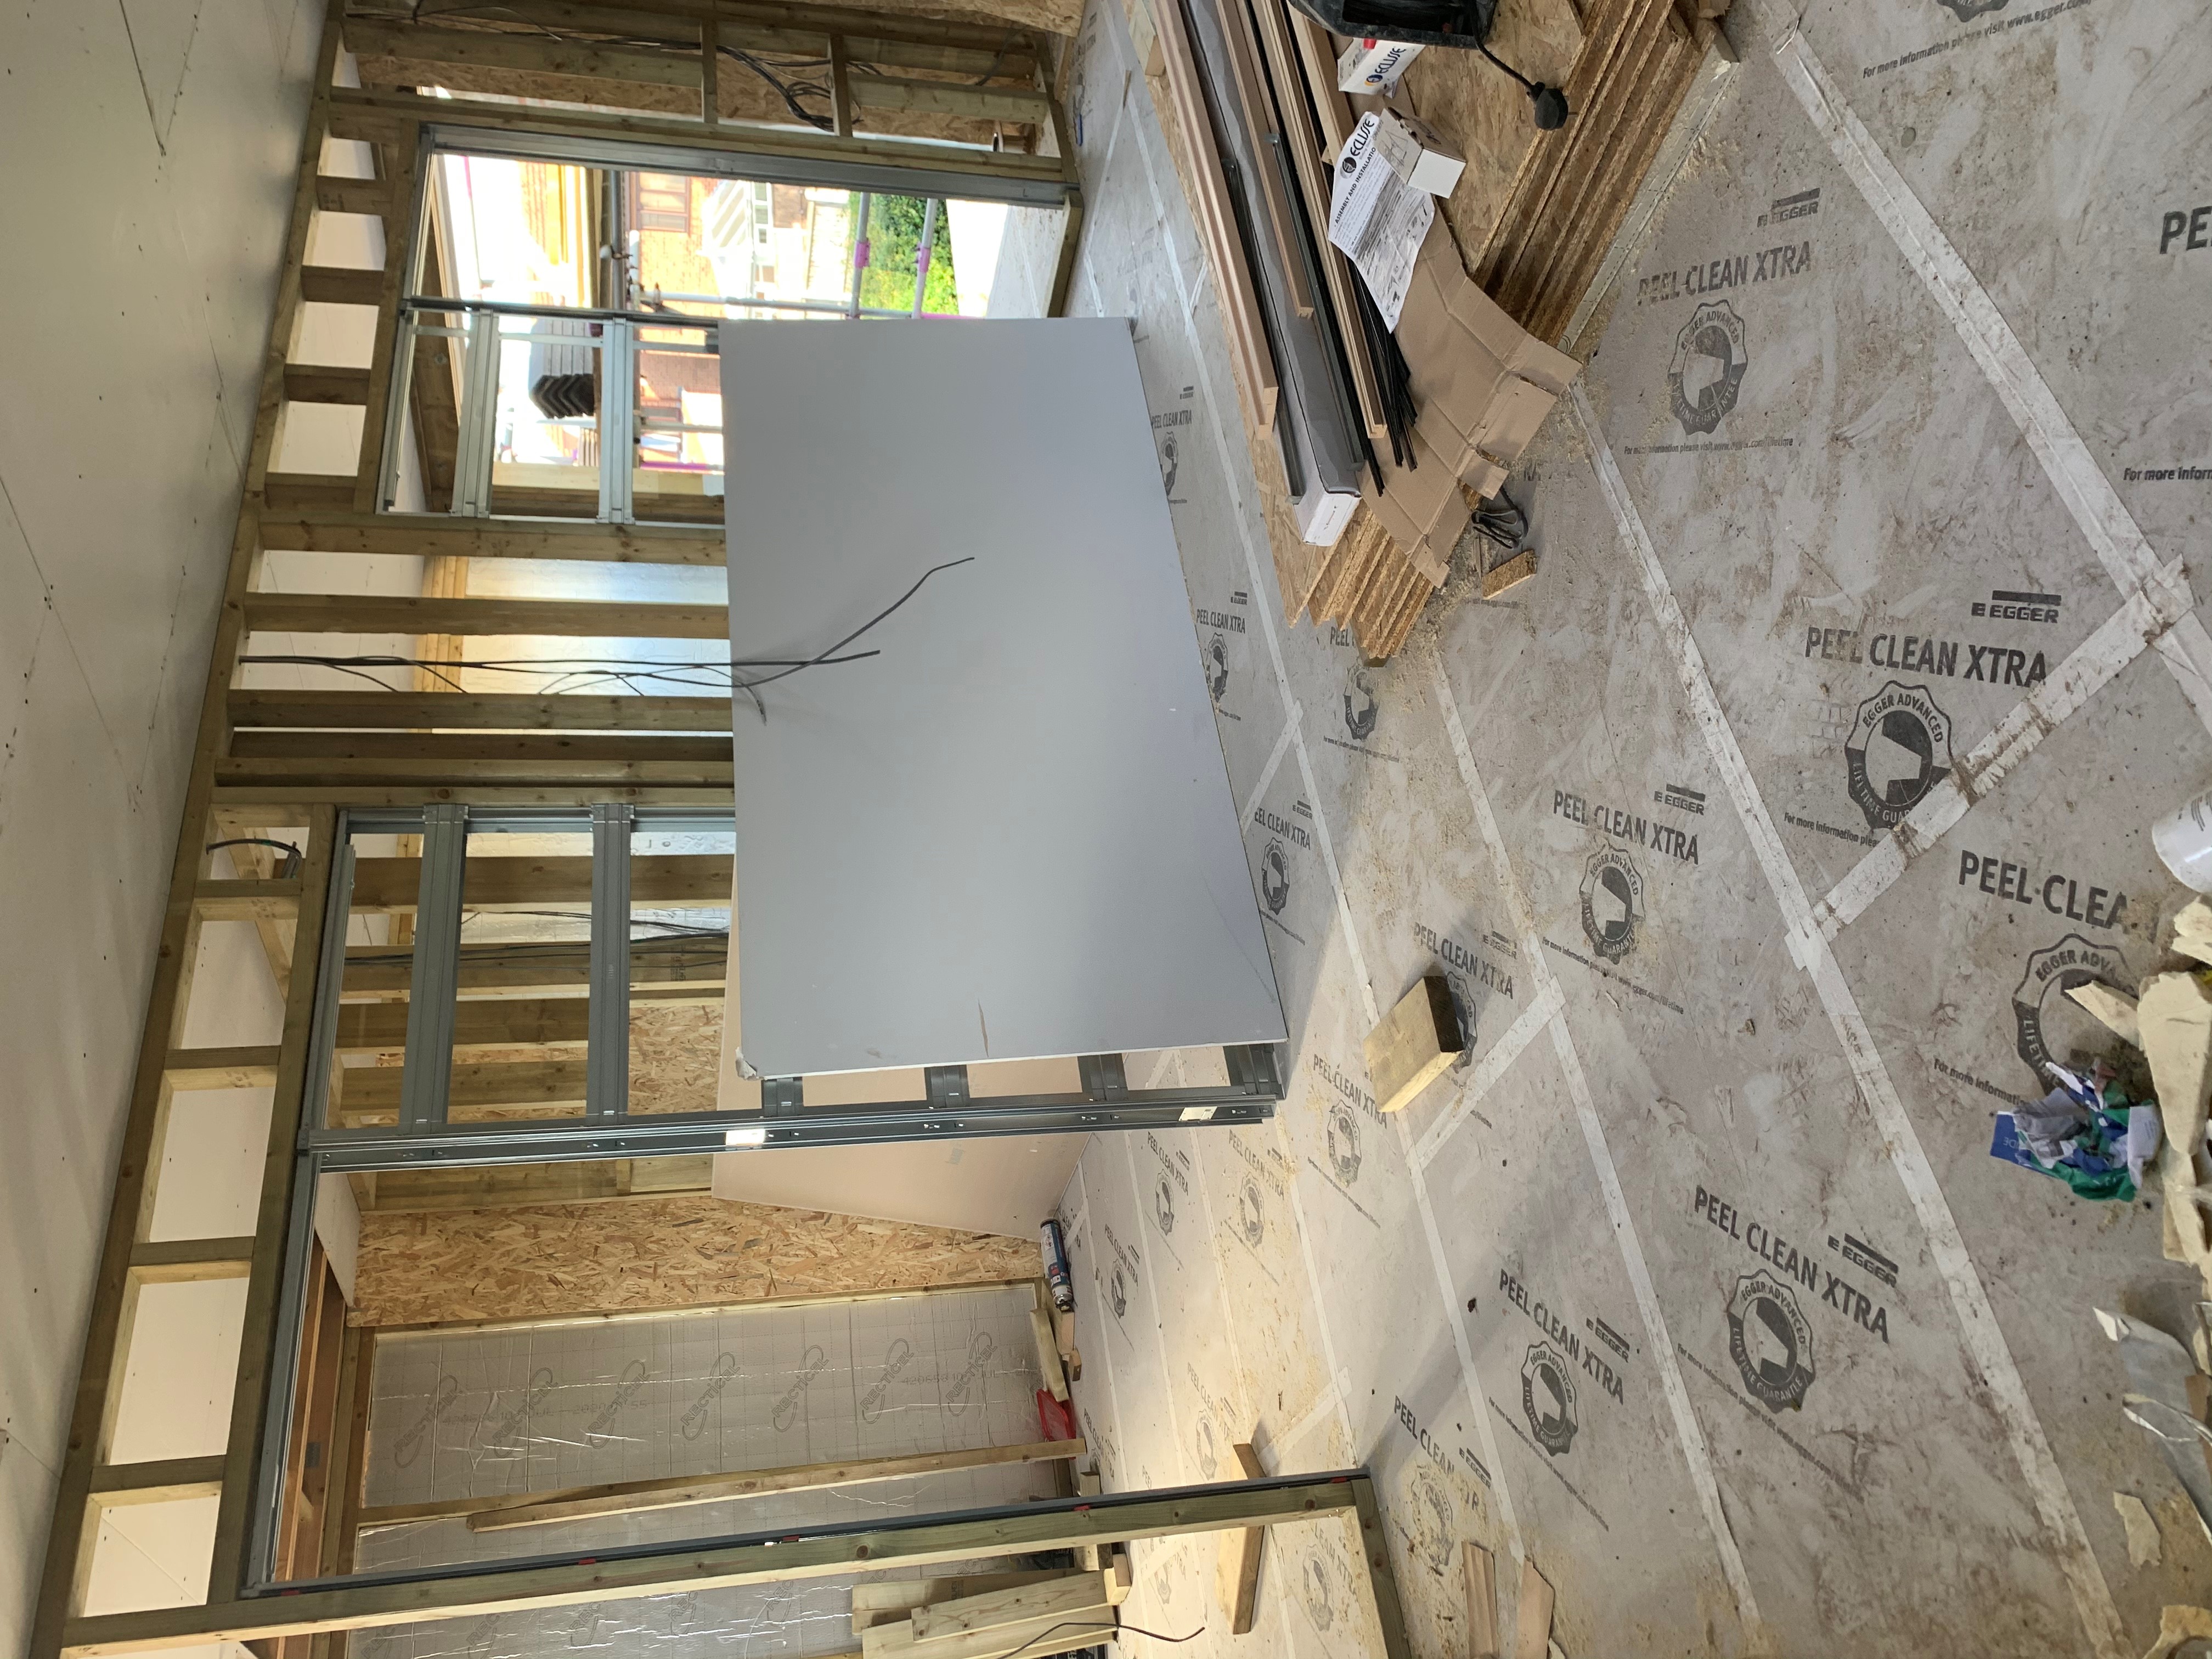
7. Create an opening between the vertical studs, that is the same width as the ECLISSE UK pocket system. You may wish to leave yourself a 5mm tolerance, and then use packers to make amendments if needed, if your studs end up not being perfect
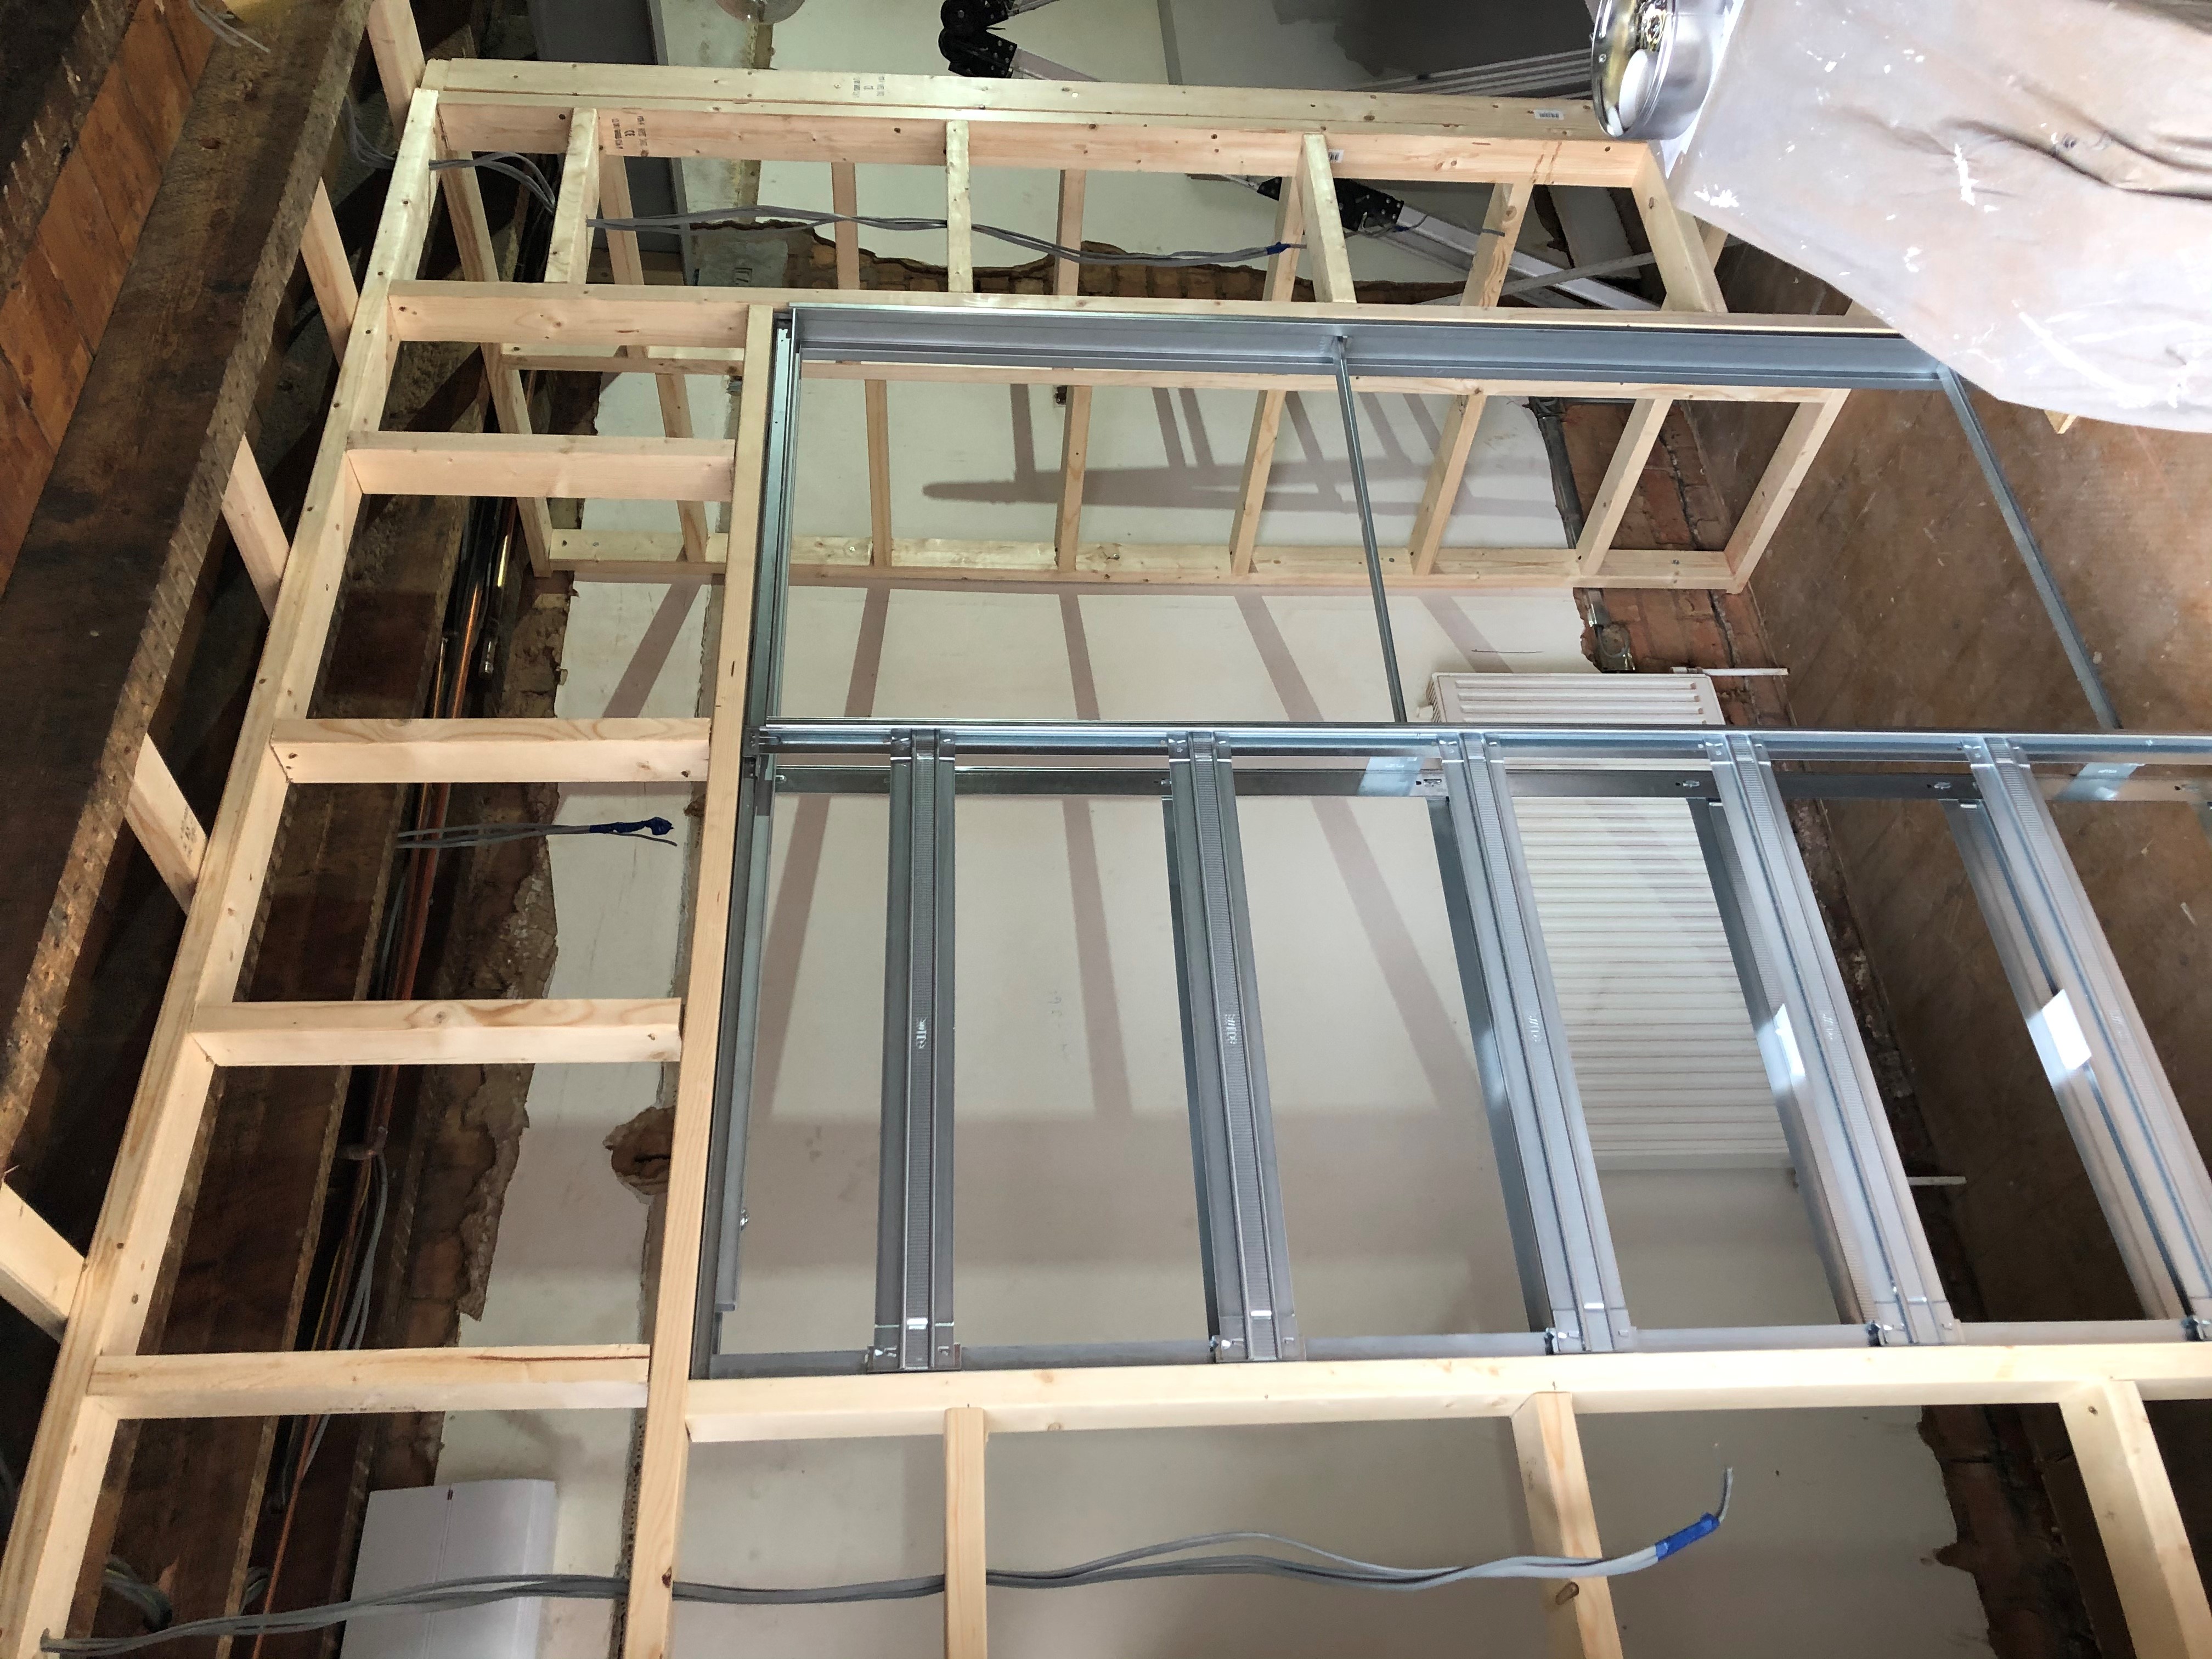
Photo Credit: @Renovate_No.28
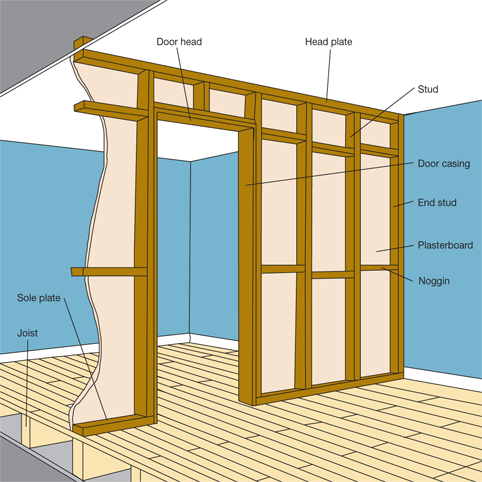
8. Once the vertical studs are in place, fix in horizontal
noggins. Dependent on the height of your ceilings one in the middle may be
sufficient. If you need two then set one at one third height and a second at
two thirds height
- Photo credit: @Renovating_thelodge
9. Fix a header, which is a secondary top plate, into place above the space where you are going to install the ECLISSE UK pocket system
10. Fix vertical noggins above the head plate. This
is where the ECLISSE UK pocket system differs to a hinged door. With a hinged
door, a vertical stud, to which the door frame is attached, takes the weight,
strain, and swing of the door. Whereas with a pocket door system most of the weight
and strain of the system is taken by the header (the secondary top plate)
which transfers the vertical load of the door up into the top plate, via the
vertical noggins and the structure above that it is screwed to such as the
intermediately floor joists (if the pocket system is on the ground floor) or
the roof joists (or structure of the building) if the pocket system is on the
first (and upper) floor(s)
11. You are now ready to install the ECLISSE door system.